Designing a custom stage for your event can make a huge impact. Whether it’s a corporate conference, wedding, or concert, the stage sets the tone and engages your audience. Here’s a quick summary of what you need to know:
- Understand Your Event Goals: Tailor the stage design to the type of event (e.g., professional for corporate, bold for concerts, romantic for weddings).
- Know Your Audience: Consider their preferences, expectations, and accessibility needs.
- Incorporate Branding and Themes: Use logos, colors, and props to reinforce your event’s identity.
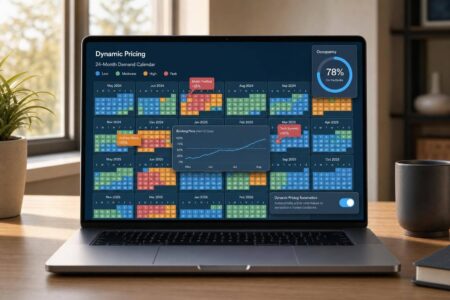
- Plan and Budget Wisely: Break down costs for materials, labor, and technology, and choose materials like fabric for elegance or LED screens for dynamic visuals.
- Collaborate with Experts: Work with designers, AV teams, and production managers for a seamless execution.
- Inspect and Test: Ensure safety, functionality, and quality before the event.
Key Tools for Stage Design:
| Software | Best For | Cost |
|---|---|---|
| SketchUp | Quick 3D concepts | Moderate |
| Blender | Realistic visualizations | Free |
| AutoCAD | Technical drawings | Expensive |
| Photoshop | Initial sketches | Moderate |
Pro Tip: A well-designed stage not only looks great but also connects with the audience and enhances the overall experience. Plan early, stay organized, and focus on details to create a memorable event.
How I designed & built my own festival stage
Setting Event Goals and Stage Design Objectives
When it comes to stage design, having clear event goals is essential. Every design choice should support the narrative of your event, creating a cohesive experience that aligns with its purpose and leaves a lasting impression.
To achieve this, focus on three key factors: the type of event you’re hosting, the needs and preferences of your audience, and how your branding is woven into the overall experience. Start by defining the type and purpose of your event so that the stage design aligns perfectly with your vision.
Determining Event Type and Purpose
The nature of your event plays a huge role in shaping the stage design. Whether it’s a corporate conference, a live concert, or a wedding, each requires a unique approach:
- Corporate events: These demand clean, professional setups that prioritize clarity and functionality. For example, the 2023 Google I/O event used multicolored strips and textured backdrops to create a polished yet dynamic look.
- Entertainment events: Concerts and performances thrive on bold, dramatic designs. From striking lighting to interactive video walls, these elements amplify the energy of the performance. A standout example is Excision’s use of a giant holographic Shrek during his Thunderdrome set, adding a playful and unexpected twist.
- Weddings: Elegance and romance take center stage here, with floral arrangements, soft lighting, and neutral tones crafting a dreamy atmosphere.
The purpose of your event also influences what stage features are prioritized. For example, concerts may require cutting-edge sound and lighting systems, while conferences benefit from minimalist designs that keep the focus on speakers and presentations.
Analyzing Your Audience
A well-designed stage isn’t just about aesthetics – it’s about connecting with your audience. Consider their age, profession, interests, and expectations to create a setup that resonates with them.
For instance, a tech-savvy crowd at a conference might appreciate sleek, modern designs with interactive elements, while attendees at a luxury gala may expect an elegant and sophisticated presentation. Accessibility and inclusivity are equally important, ensuring clear sightlines, suitable lighting for photography, and stage heights that accommodate all participants.
To gather these insights, use tools like surveys, monitor online discussions about your event, and develop detailed attendee profiles. These steps help you design a stage that not only looks great but also feels relevant and engaging to your audience.
Matching Design with Event Branding and Themes
Your stage design should seamlessly reflect your event’s branding and theme, reinforcing your message and creating a memorable experience. Consistent branding across all elements builds trust and credibility with attendees. This can include incorporating logos, brand colors, and messaging in a way that enhances the overall atmosphere without feeling overwhelming.
For example, 84% of event attendees report feeling more positive about a brand after experiencing it in person. Apple’s annual product launches are a prime example of this concept in action, with every detail – stage design, invitations, and visuals – aligned with their minimalist yet forward-thinking identity.
Beyond branding, thematic elements like lighting, props, and backdrops can transform a stage into an immersive environment that embodies your event’s theme. Custom stage wraps and thoughtful layouts for podiums, screens, and microphones ensure both clarity and a cohesive aesthetic.
Partnering with experienced event production companies can make a big difference in bringing your branding and design vision to life. For example, Essentialyfe specializes in blending luxury venue aesthetics with tailored stage designs to deliver a unified and impactful brand message .
Planning and Developing the Stage Design
With clear objectives in mind, it’s time to turn your ideas into a tangible stage design plan. This step involves evaluating the venue, crafting a detailed design brief, and using digital tools to bring your vision to life. This is where initial brainstorming meets practical execution.
Visiting and Evaluating the Venue
The venue is the canvas for your stage design, so start by estimating attendance to confirm the space can comfortably accommodate your audience. Beyond capacity, take note of physical features that could affect your layout. Measure the available space and identify any architectural quirks like columns, low ceilings, or unusual layouts that might pose challenges.
Check the venue’s electrical setup, including outlet locations, since lighting, sound, and interactive elements typically demand significant power. Rigging capabilities are equally important – ensure there are adequate mounting points and structural support for equipment such as lights, speakers, and any special effects.
Don’t overlook the acoustics. Factors like ceiling height, wall materials, and room shape can significantly impact sound quality. Lastly, evaluate how the venue’s layout supports smooth movement between key areas like registration desks, seating, and networking spaces.
Creating a Design Brief
A well-crafted design brief is your roadmap for the project. It sets clear expectations and minimizes the risk of costly misunderstandings. Start by explaining the project’s purpose and how the design will align with your event goals. Whether you’re aiming for visual impact, functionality, or audience engagement, make these priorities clear.
Define your target audience by outlining attendee demographics, preferences, and accessibility needs. Also, consider factors like optimal viewing angles to enhance the audience experience. Be upfront about budget and timelines. Break down the budget into categories like materials, labor, and technology, and outline a timeline that includes design development, approvals, procurement, and installation.
Incorporate your brand guidelines to ensure the design aligns with your organization’s identity. Finally, list all deliverables and scope boundaries – from concept sketches to final installation oversight – to keep everyone on the same page. Once the brief is finalized, you can move on to using design tools for detailed visualization.
Working with Design Tools
With a clear brief in hand, digital tools can help refine and visualize your stage design. These tools have revolutionized the way concepts are developed and communicated, enabling you to create detailed visuals and precise technical plans.
For brainstorming and initial sketches, tools like Photoshop and Procreate offer flexibility and speed. To illustrate spatial relationships and how the design fits the venue, 3D modeling tools such as SketchUp and Blender are invaluable. They allow stakeholders to see how the design will work in real-world settings.
When it comes to technical documentation, AutoCAD is the go-to for creating accurate floor plans and construction drawings, while Vectorworks offers features tailored for live events and theater productions.
| Software | Cost | Learning Curve | Best For | Key Strengths |
|---|---|---|---|---|
| SketchUp | Moderate | Low | Quick 3D concepts | Easy to use, fast modeling |
| Blender | Free | Medium | Realistic visualization | Advanced 3D capabilities |
| AutoCAD | Expensive | High | Technical drawings | Precision and industry-standard |
| Photoshop | Moderate | Medium | Initial sketches | Versatile editing tools |
Choose tools based on your project’s specific needs, keeping in mind factors like ease of use, compatibility, and team expertise. While these tools are powerful, their true value lies in how effectively they help you communicate your vision to your team and stakeholders.
Budgeting and Choosing Materials
Once you’ve finalized your design plan, the next step is to figure out costs and pick materials that bring your vision to life. Striking a balance between your creative goals and financial limits is key to ensuring your stage design delivers on expectations.
Creating a Complete Budget
Building a solid budget for stage design involves more than just factoring in materials and labor. You’ll need to account for both direct costs (like salaries and equipment) and indirect expenses (such as rent and utilities). Start with rough estimates based on early discussions with your team and vendors, then refine these into a more detailed budget centered around your main deliverables.
Your budget should cover all phases of the project:
- Pre-production: Design development, planning, permits
- Production: Construction, installation, testing
- Post-production: Breakdown, cleanup, storage
Be sure to include key categories like personnel costs, technical elements (lighting, sound), venue expenses, and administrative overhead. It’s also smart to set aside a contingency fund – typically 10–20% of your total budget – for unexpected costs. Use tools like spreadsheets or budgeting software to track expenses in real time, monitor labor hours, and compare actual costs to your estimates. Establish a timeline for when expenses will occur and create a clear process for approvals and adjustments.
Comparing Stage Materials
Choosing the right materials means balancing cost, durability, and visual impact to suit your event’s specific needs.
| Material | Cost Range | Durability | Best For | Key Considerations |
|---|---|---|---|---|
| Fabric | Low–Medium | Medium | Weddings, elegant events | Elegant look but needs careful handling |
| Vinyl | Medium | High | Corporate events, outdoor venues | Durable and weather-resistant, easy to print |
| Wood | Medium–High | High | Rustic weddings, natural themes | Timeless look but heavy to transport |
| LED Screens | High | Medium | Concerts, tech events | Dynamic visuals but expensive and needs tech support |
Fabric is a go-to for creating a soft, sophisticated vibe, making it ideal for weddings or upscale corporate events. However, it requires careful handling to avoid wrinkles and may not hold up well outdoors. Vinyl, on the other hand, is tough and weather-resistant, making it perfect for branded setups at outdoor or corporate events. It lacks the softness of fabric but makes up for it with its durability and ability to display detailed prints. Wood offers a classic, natural aesthetic that’s perfect for rustic or nature-themed events, though its weight can make transportation tricky. For high-energy events like concerts or tech showcases, LED screens provide dynamic, modern visuals, but they come with a hefty price tag and require technical expertise.
When selecting materials, consider your venue’s restrictions – some locations may limit certain installations. Also, think about your audience. A bold, high-energy setup might captivate a younger crowd but could feel overwhelming for a more formal corporate gathering. By aligning your material choices with your design goals and budget, you’ll create a stage that’s both functional and visually stunning.
Choosing Finishes and Decorative Elements
The finishing touches can turn a functional stage into a visual masterpiece. Color schemes are crucial for setting the right mood – soft pastels are perfect for weddings, while bold, vibrant colors are better suited for corporate events or product launches. For corporate gatherings, incorporating logos or branding into backdrops can reinforce a company’s identity and create a unified brand experience that resonates with attendees.
Lighting is another powerful tool. It can highlight key features and set the overall tone of the event. Consider how your materials will interact with lighting – fabric often looks beautiful under colored lights, while vinyl maintains a more consistent appearance regardless of lighting changes. If you’re working within a tight budget, partial customizations and reusable elements can be cost-effective ways to achieve a polished look. Even simple materials, when paired with thoughtful lighting and color choices, can create an impressive effect.
For example, My One of a Kind Event specializes in themed backdrops tailored to each event’s purpose and style, offering options from sleek corporate designs to playful, celebratory setups. For outdoor events, weather-resistant solutions like Alaska Structures’ WeatherPort® Jubilee series fabric buildings provide a mix of durability and aesthetic appeal, proving that practicality and style can coexist.
Lastly, consider sustainability. Opting for eco-friendly materials not only reduces environmental impact but also appeals to attendees who value greener practices.
sbb-itb-161ccc1
Working with Designers and Production Teams
Bring together a team of event planners, designers, and production experts to turn your vision into a standout stage design.
Building a Design and Production Team
Start by assembling a group that includes a stage designer who balances style with practicality, lighting specialists to set the ambiance, AV technicians to handle sound and visuals, and a project manager to keep everything running smoothly.
When picking your team, prioritize those with experience in events similar to yours. Ask for examples of their past work that align with your event type and check their history with live shows. Make sure to speak directly with key players like the project manager, technical lead, and show caller – these are the people who will be hands-on with your event. This direct interaction ensures you’re partnering with individuals who can handle both the creative and technical sides effectively.
Choose a team that works well together. Strong communication and problem-solving skills are essential for addressing challenges quickly. Confirm who your primary contact will be during planning and on-site, and ensure the same team stays involved from start to finish.
It’s also worth considering how well the team’s values align with your organization’s. For instance, if sustainability or community engagement is important to your brand, ask whether the production company incorporates those principles. A team that shares your priorities is more likely to deliver results that feel authentic to your vision.
Once your team is set, establish smooth workflows to keep the project on track.
Setting Up Workflow and Communication
Clear communication and organized workflows are the backbone of a successful project. Begin by creating a shared project brief that outlines essential details, timelines, and milestones. This document acts as the central reference point for everyone involved.
"Effective communication that happens on schedule via clearly established channels is vital." – Bishop-McCann
Hold regular team meetings to keep everyone updated and engaged. For most projects, weekly check-ins work well, but more intricate designs might require additional updates. Encourage team members to share ideas or concerns early – addressing issues promptly can save time and resources down the line.
Define roles and responsibilities clearly, especially for handling unexpected situations. For example, the lighting designer should know exactly who to contact if equipment malfunctions, and the project manager should have the authority to make quick decisions when needed. Documenting these roles in writing minimizes confusion during high-pressure moments.
Select communication tools that work for the entire team, whether that’s email, instant messaging, or project management software. Stick to these channels consistently and set clear expectations for response times. This consistency builds trust and creates an environment where open communication leads to effective problem-solving.
Meeting Performer and Presenter Requirements
Your stage design needs to prioritize the safety, visibility, and functionality required by performers and presenters.
Start by reviewing the venue’s specifics to ensure your design fits both the space and the performers’ needs. Create a detailed floor plan showing the placement of speakers, screens, furniture, and pathways for easy entrances and exits. This ensures the layout works within the venue’s constraints while addressing the practical needs of your performers.
Plan speaker placement for even sound distribution and set up lighting that enhances visibility while complementing the event’s tone. Choose microphones based on the presenters’ styles – wireless lapel mics for those who move around, or podium mics for those who stay in one spot.
Safety should always come first. Verify that any elevated or suspended elements meet fire safety regulations and ensure stage arrangements don’t block emergency exits or safety equipment. Keep your design flexible so you can easily accommodate last-minute changes, like additional equipment or layout adjustments.
Finally, schedule technical rehearsals to give presenters a chance to test equipment, familiarize themselves with the stage, and make any necessary tweaks. These run-throughs often uncover small adjustments that can significantly boost confidence and contribute to the event’s overall success.
Building and Installing the Stage Design
Once your budget is finalized and materials are selected, it’s time to roll up your sleeves and bring your stage design to life. This phase involves turning plans into reality through careful execution, teamwork, and attention to detail. Here’s how to move from preparation to a fully installed stage.
Creating a Production Timeline
A well-thought-out production timeline is crucial for a smooth installation process. Break the project into smaller, manageable tasks, assigning clear deadlines to each. Start with the basics – structural supports and platforms – before moving on to technical elements like lighting and sound. Wrap up with decorative touches to complete the look. For teardown, reverse the order: decorations come down first, followed by technical and structural components. Make sure to build in extra time for unexpected delays.
Using project management tools or digital checklists can help keep the entire team on track. These tools ensure that everyone knows what needs to be done and when, reducing confusion and keeping the project moving forward.
Handling On-Site Operations
Once materials arrive at the venue, efficient on-site management becomes key. Start by ensuring easy access for workers, equipment, and materials – this includes planning for clear entry points, delivery schedules, and emergency routes. Coordinate material deliveries based on your timeline: structural items should arrive first, followed by technical gear, and finally, decorative pieces. This approach minimizes clutter and keeps the workspace organized.
Regular communication is essential. Schedule daily check-ins and use reliable tools, like construction management apps, to share updates, access blueprints, and address any issues quickly. If something doesn’t align with the plans, remeasure and adjust promptly to avoid delays.
Conducting Final Inspection and Quality Check
Before the event kicks off, a thorough inspection ensures everything is safe, functional, and visually appealing. Develop a checklist that covers all critical aspects: structural stability, electrical connections, lighting, sound, and overall design. Pay special attention to compliance with local fire safety codes and building regulations. Make sure the stage setup doesn’t obstruct emergency exits or safety equipment.
Test all technical systems under real-world conditions – run lighting and sound as they would operate during the event. Walk through the setup with key stakeholders to confirm everything meets expectations. Document the installation with photos and equipment records, ensuring any last-minute adjustments can be made quickly and efficiently. By the time the event begins, you’ll have a stage that’s safe, functional, and ready to impress.
Key Points for Successful Custom Stage Design
Crafting a stage that leaves a lasting impression requires thoughtful planning and teamwork. These principles build on earlier steps like defining objectives, budgeting, and choosing materials.
A successful stage design strikes a balance between creativity and practicality. Start by establishing a clear theme that reflects the event’s identity. Every detail – whether it’s the structure, decorations, or props – should tie back to this central idea. Also, make sure the stage dimensions align with the venue’s layout and seating arrangements to ensure everyone has a clear view.
Strong communication is essential. Regular meetings, progress updates, and visual references help keep everyone on the same page and ensure the design stays cohesive.
"Lighting is not just about illumination; it’s about how we feel in a space." – Ingo Maurer, Light designer
Branding should feel natural, not overpowering. Incorporate logos, props, and color schemes in a way that enhances the design without dominating it.
Dynamic lighting and well-integrated audiovisual elements can elevate the mood and ensure the audience stays engaged. A well-designed stage not only grabs attention but also creates a seamless connection between the presenters and the audience, enriching the overall experience.
For high-end events that require extraordinary venues and meticulous planning, Essentialyfe provides curated spaces and full-service event management. They focus on aligning every detail with your vision to create an unforgettable event.
FAQs
How can I ensure my stage design reflects the event’s branding and theme effectively?
To craft a stage design that truly reflects your event’s branding and theme, start by weaving in essential brand elements like colors, logos, and messaging. These elements not only reinforce your brand identity but also create a sense of unity throughout the event.
From there, align the stage design with the event’s central theme or storyline. Choose textures, materials, and decor that echo the event’s purpose while keeping the aesthetic clean and sophisticated. Thoughtful additions, such as props or lighting that match the event’s tone, can make the stage visually captivating and leave a lasting impression.
Lastly, consider teaming up with professional designers or event planners to bring your vision to life. Their expertise ensures that every detail – whether it’s the stage layout or the lighting setup – works together seamlessly to elevate the audience’s experience.
How can I create a stage design that is visually stunning and accessible for all attendees?
To design a stage that’s both eye-catching and easy to navigate, start with a layout that guarantees clear views and smooth movement for everyone in the audience. Use strategically placed lighting to draw attention to key areas, ensuring the stage feels vibrant and engaging. At the same time, keep pathways wide and accessible, making it easier for guests with mobility challenges to move around comfortably.
Add inclusive elements like ramps, clear and easy-to-read signage, and seating options that cater to all attendees. For the visual side, aim for cohesive branding, striking backdrops, and interactive features that tie into the event’s theme. By blending practical design with a creative touch, you can build a stage that’s not only memorable but also welcoming to all.
What factors should you consider when selecting materials for stage design, and how do they influence the event experience?
When picking materials for stage design, it’s all about balancing strength, safety, style, and eco-consciousness. Sturdy materials ensure the stage stays solid and secure throughout the event, while safety measures protect everyone involved, from performers to the audience.
The look and feel of your event are also shaped by the materials you choose. For instance, sleek, polished surfaces can give off a modern, professional vibe, while natural materials like wood bring a sense of warmth and sophistication. If being environmentally conscious matters to you, reclaimed or recycled materials can help reflect those values.
The right choice of materials doesn’t just check practical boxes – it elevates the entire experience by combining safety, aesthetics, and usability, making your event unforgettable.